Floss like a Boss
Flossing is an important oral
hygiene habit. It cleans and
dislodges food stuck between your teeth, which reduces the amount of
bacteria and plaque in your mouth.
Improper flossing can
potentially damage your teeth and gums.
The ADA recommends flossing at least once per day and brushing twice
per day.
Generally
recommended to floss and then brush your teeth. Flossing helps lift and release food and plaque stuck in between your
teeth, while brushing removes these particles from your mouth. If you brush
first and floss afterward, food and plaque remains in your mouth until the next
time you brush.
Types of dental
floss
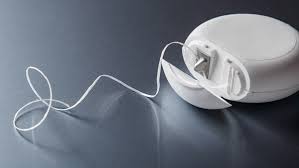
Standard floss: This is a thin, nylon strand that can
fit in between teeth. It comes flavored or unflavored as well as waxed or
unwaxed. If your teeth are crowded or closer together, dental floss with a wax
coating can make it easier to get in between them.
Super floss:This dental floss threader can work with
braces, bridges, and gaps. It has three components: a stiffened end for
flossing underneath appliances, spongy floss to clean around your appliances,
and regular floss to eliminate plaque underneath your gumline.
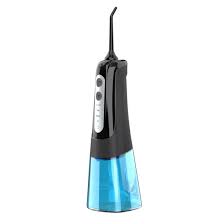
Water Flosser: It which uses
water and pressure to remove plaque and food from in between teeth. A water
flosser is also useful if you have braces. This device can clean in between
brackets and wires.
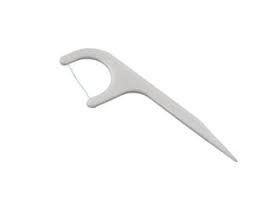
Disposable
floss picks: They’re easy to use and can help you floss hard-to-reach teeth
in the back of your mouth.
Flossing instructions
- ·
Take about 18 to 24 inches of dental floss. To hold the floss
correctly, wind most of the floss around both of your middle fingers. Leave
only about 1 to 2 inches of floss for your teeth.
- ·
Next, hold the floss taut with your thumbs and index fingers.
- ·
Place the dental floss in between two teeth. Gently glide the
floss up and down, rubbing it against both sides of each tooth. Don’t glide the
floss into your gums. This can scratch or bruise your gums.
- ·
As the floss reaches your gums, curve the floss at the base of
the tooth to form a C shape. This allows the floss to enter the space between
your gums and your tooth.
- · Repeat the steps as you move from tooth to tooth. With each tooth, use a new, clean section of floss.

Water Flosser:
Many
people find water flossing easier and more pleasant than using string floss,
and they may floss more often as a result. It was
also 26% better than flossing and 53% better than just brushing in
terms of reducing bleeding gums. The ability to manipulate the water flosser to
direct the water towards the teeth and gums makes it a lot easier to use when
cleaning.
Gum disease prevention and treatment is another reason to use a water flosser. Water Flossers are clinically proven to reduce gingivitis, remove plaque, and improve gum health. It is especially useful for cleaning braces and other orthodontics, as well as cleaning bridges, crowns, and dental implants.
Water flossers are helpful for people with dexterity issues, such as arthritis, who find string flossing difficult.
How to use a water flosser
· Supply the water source — This may mean connecting it to the water tap or filling the reservoir with lukewarm water.
· Placement — Place the nozzle in your mouth and, starting with your molars, hold the irrigator away from your teeth and gums rather than directly against them. You may want to lean over the sink now, so you don’t splash water on your countertop when you turn it on.
· Select pressure setting and turn on — There will be either an on-button or a dial that adjusts the water pressure. Start with the lowest pressure setting and work your way up. Make sure the pressure is high but comfortable. You can close your lips to prevent the water splashing but be sure to allow the water to drain out into the sink.
· Follow gum line — Going tooth-by-tooth, direct the water at your gum line and areas between teeth. Aim for the top of the tooth, baseline of the gum, and the space between each tooth. Hold the water over each tooth for about two seconds, repeating the process on the inside and outside of your teeth until your whole mouth is treated. It should take you about two minutes to complete.
· Empty the reservoir — Once you’re done, turn off the device, remove the nozzle and drain the remaining water. Leaving stale water in your reservoir can cause bacteria to grow.
· Clean your device — Remember to rinse your water flosser’s reservoir after every session, to ensure it is hygienic.
iDent, Idyll Dental Clinic
To book an appointment with us:
Call us at: +912240147049/09321330133
Email: smileident@gmail.com
Website: www.smileident.com
No comments:
Post a Comment